
Saint Patrick’s Day DIY

We have been having a lot of fun making Saint Patrick’s Day DIY decor. Below you will see some of the items we made to stage on our front porch. We prefer to use items that we have in our house (ie. repurpose) OR can be purchased “dirt cheap”. Mission accomplished here!
Saint Patrick’s Day Dollar Tree Clover DIY
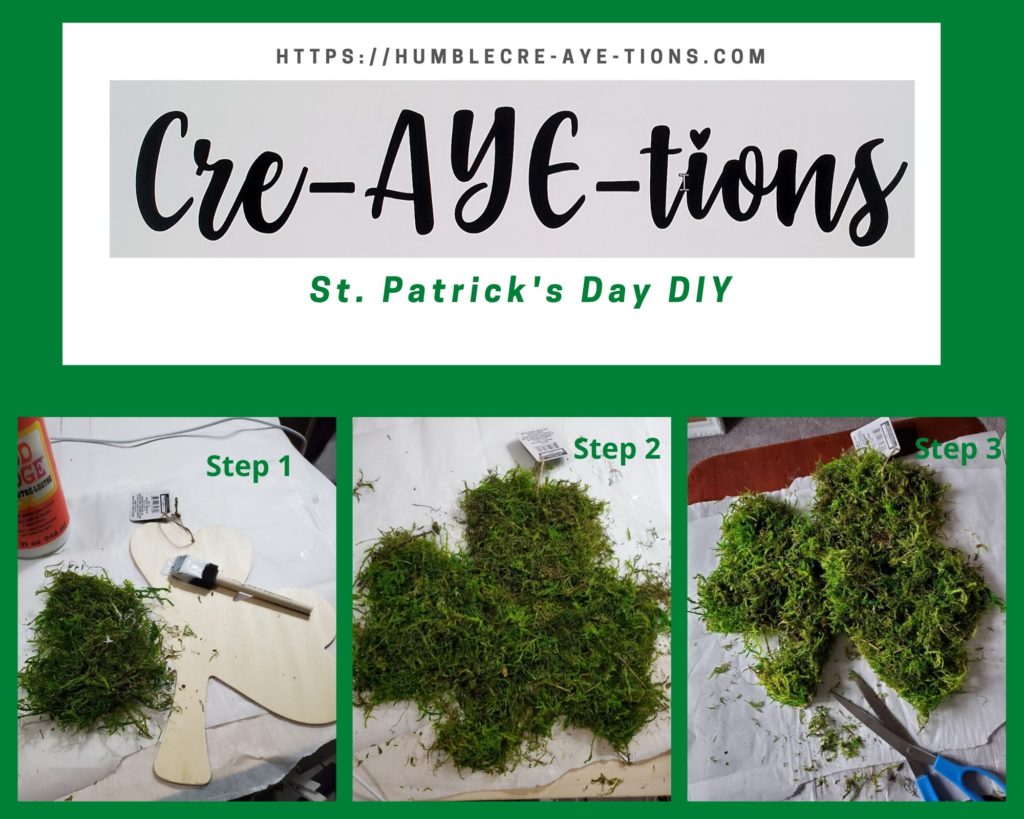
Any chance I get I will try to incorporate moss in a project. What better time of the year to use “green” moss!!! Great opportunity to use it in my Saint Patrick’s Day DIY project!!! This project required a trip to the Dollar Tree. The Dollar Tree is a treasure shop if you can use a bit of imagination. This is where I purchased a wood template of a clover and decided to incorporate my green moss.
All you need are:
- Clover wood template from the Dollar Tree
- Mod Podge
- Sponge brush (to apply Mod Podge)
- Green moss (can be purchased at Wal Mart, Hobby Lobby, or any store that has a craft section)
- Scissors
- Spray adhesive (I use Gorilla Adhesive Glue purchased at Wal Mart)
Below are photos showing the steps taken here:
- Cover a portion of the clover wood template in Mod Podge. Press bunches of green moss on top of your Mod Podge (it is ok if you can feel the Mod Podge glue oozing through the moss….it drys clear).
- Continue Mod Podging the green moss over your entire clover until it is covered. DO NOT WORRY about being neat. In fact, OVER flow the moss on the clover.
- After the Mod Podge dries cut the over flow moss around the edges of the clover and inspect your masterpiece. (If you find some bald spots you can apply more Mod Podge and moss on any of those skimpy areas).
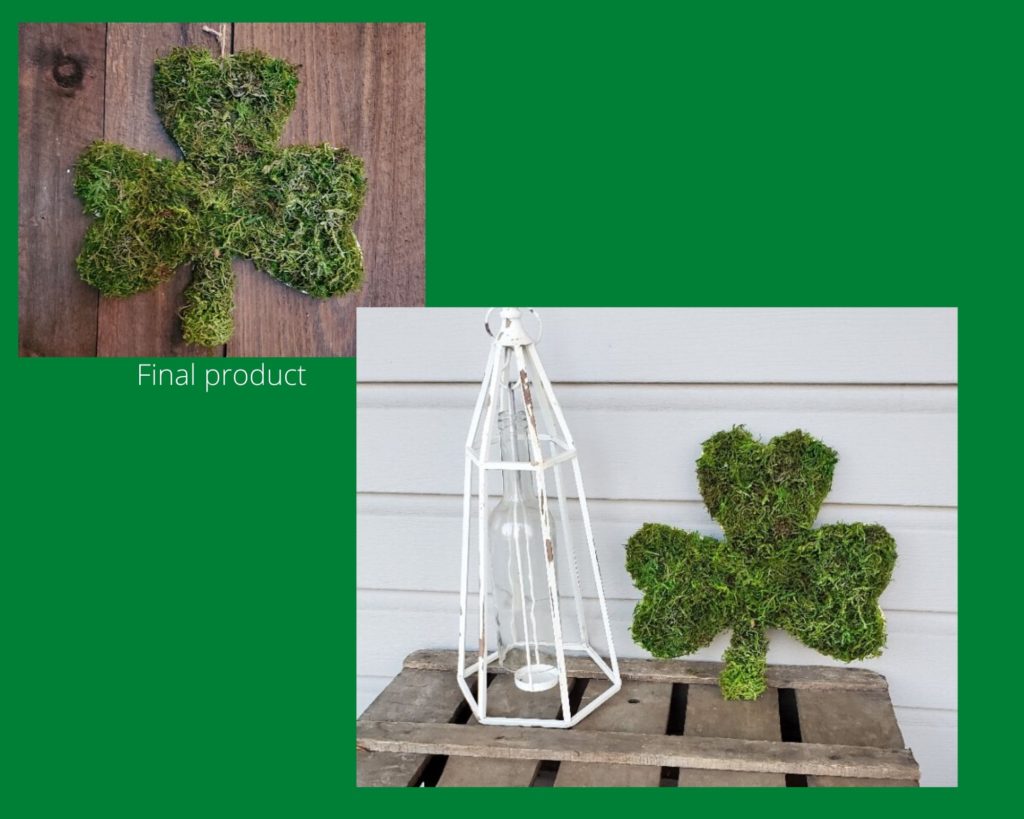
- After you have glued all of the moss onto the clover, spray a few layers of Adhesive Glue spray to keep the loose moss pieces intact.
Saint Patrick’s Day Clover Planters DIY
My next Saint Patrick’s Day DIY project included some repurposing of tin cans I have at home. I thought I would add some rustic clover planters to my front porch. These are very simple to do. Once you see them they will be self explanatory.
All you need are:
- Tin cans (from food items like beans, vegetables, etc.)
- Rust-oleum Primer (found at Wal Mart)
- Rust-oleum Chalk paint (found at Wal Mart)
- Jute cord (optional)
- clover cut outs (optional)
- Clover weeds from your yard or natural area (YES….”I went there”)
Following the steps below:
- Wash your tin cans thoroughly and remove any glue
- Spray your tin cans with Primer
- Once the Primer dries (about 15 minutes) spray your tin cans with Chalk paint. This may take a couple of coats (drying time varies)
- OPTIONAL: Take some jute cord and wrap around the top portion of the tin cans. Leave 2 jute cords hanging so you can add some clover decor.
- THIS IS FUNNY! I used pages from a real book to cut out clover shapes with my Cricut. These clover cutouts were then glued to the hanging jute cords. BIT OF ADVISE….if you go this route BE SURE TO READ the words you are using in your project. I have NO IDEA what the book is about that I am using BUT there are some “pretty risque” words. I didn’t realize it until I printed a few clovers and those words “jumped out” at me. Needless to say I threw those away and had to “police” my next cut outs. I couldn’t be mad at myself because I was laughing so hard.
- NOW, go on a scavenger hunt and look for those pesty clovers that you can’t kill with a blow torch. I decided I would embrace those “little devils” during St. Patrick’s day since they go with the theme. Once you find some clovers, plant them in your tin can planters.

For other tin can projects visit our post Yes you Can-Can!
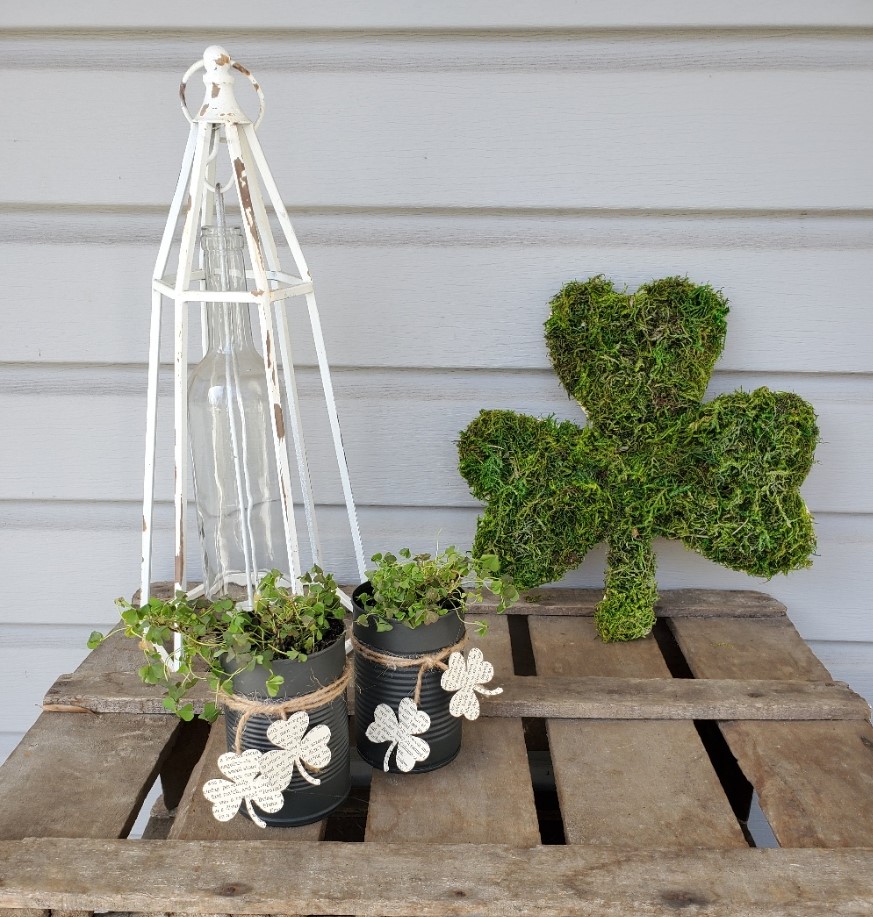
FINAL Front Porch
This is how my front porch looks now!!!

HAPPY ST. PATRICK’S DAY from CreAYEtions!


You May Also Like
Live “outside of the box” with our quarantine kids

DIY Furry Trees