
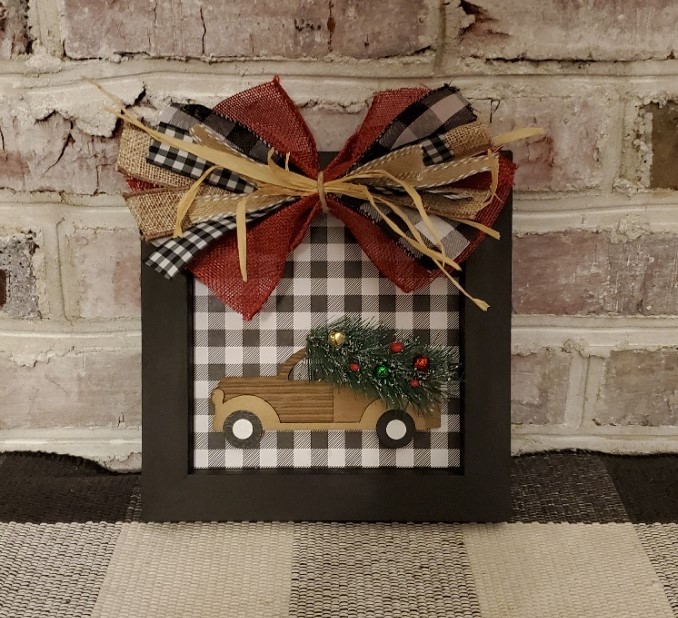
Easy DIY Christmas Plaque
I love the buffalo plaid look so in order to incorporate it in my Christmas decor pallet this year I better get started making some DIY projects to feed my “plaid fetish”. Below is a DIY Christmas Plaque that I was able to do in “no time” with my favorite buffalo plaid.
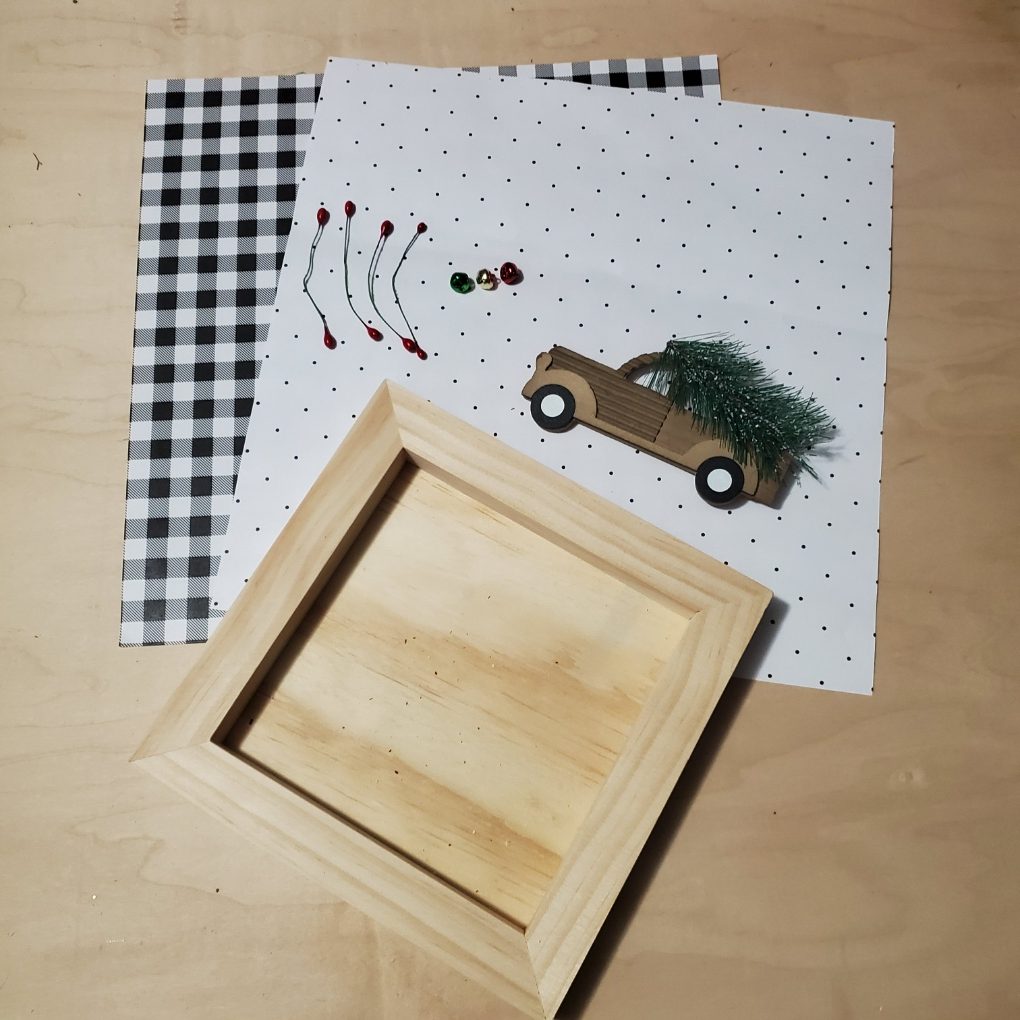
My supplies for this project came from Hobby Lobby and Dollar General. Here is a list of supplies I used:
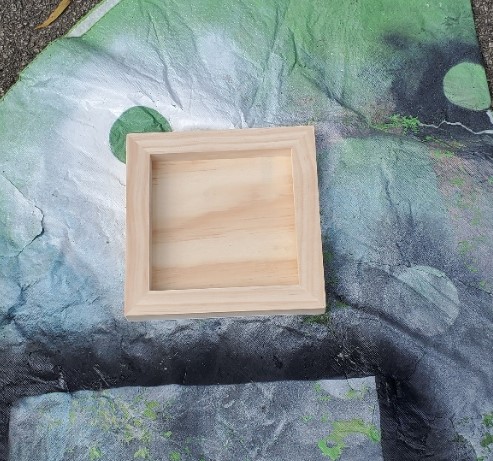
- Unfinished wood framed plaque (these can be found at Hobby Lobby and Michaels in a variety of sizes and shapes)
- Spray paint (black)
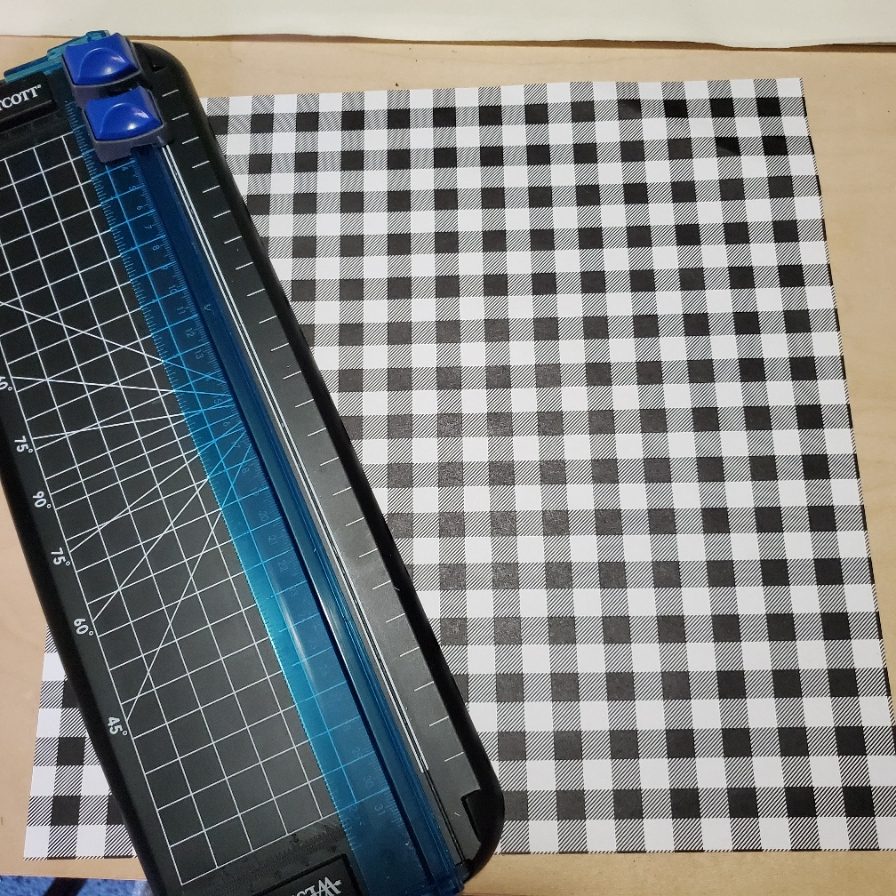
- scrapbook paper (decor of your choice)
- adhesive spray
- hot glue gun
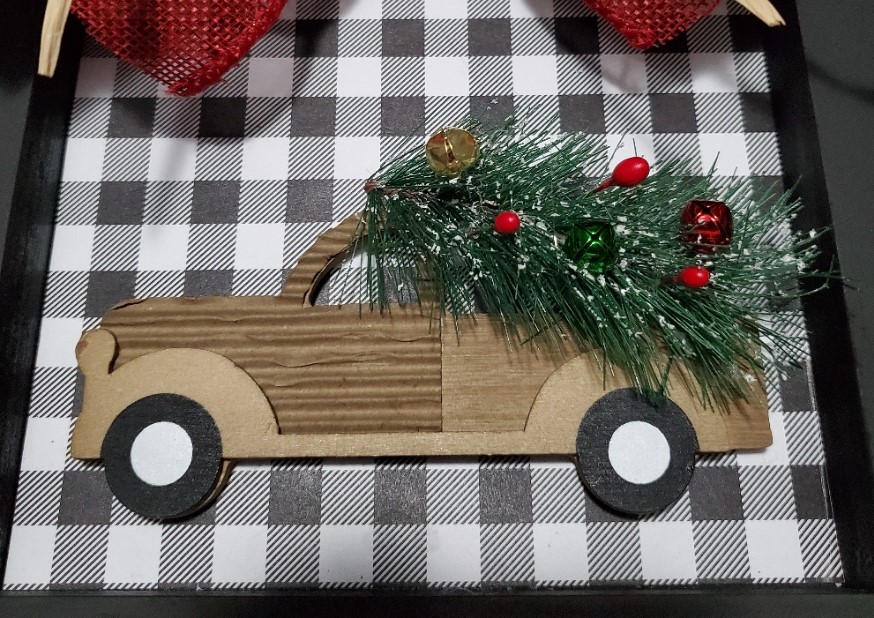
- ornament (I found a cute “pick up” truck ornament at Dollar General for $1)
- Misc embellishments (optional)
- Ribbon for bow
FIRST – Paint your unfinished wood frame/plaque

SECOND – cut your scrapbook paper to size to fit inside the framed portion of the plaque
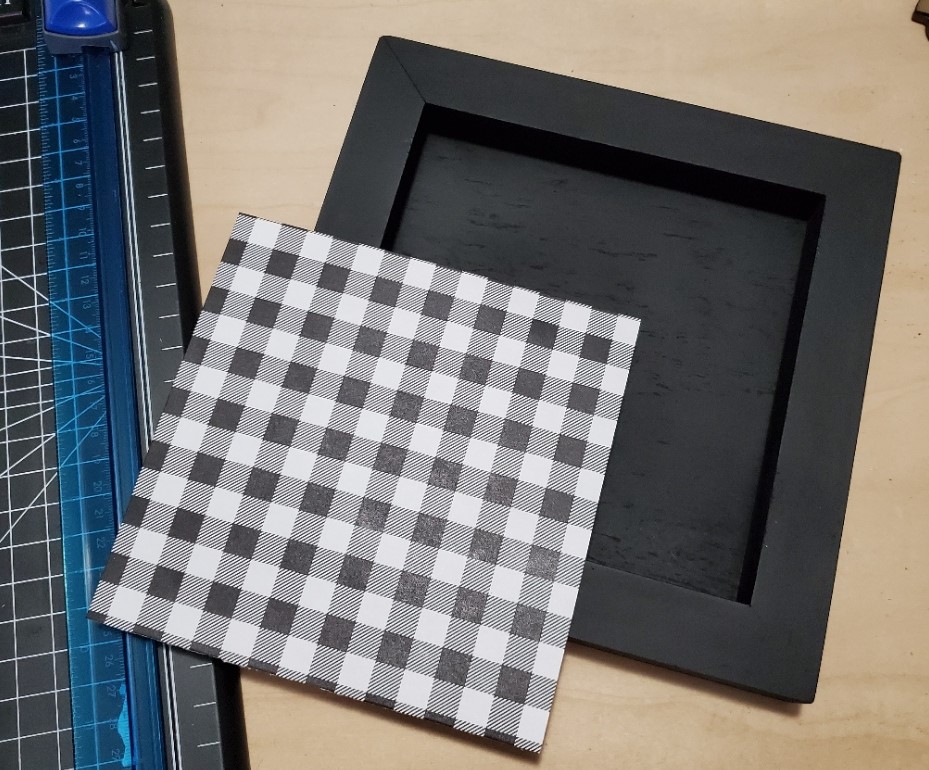
THIRD – glue the cut scrapbook paper to the inside of the frame (I used adhesive spray) and then hot glue the ornament into place on top of the scrapbook paper
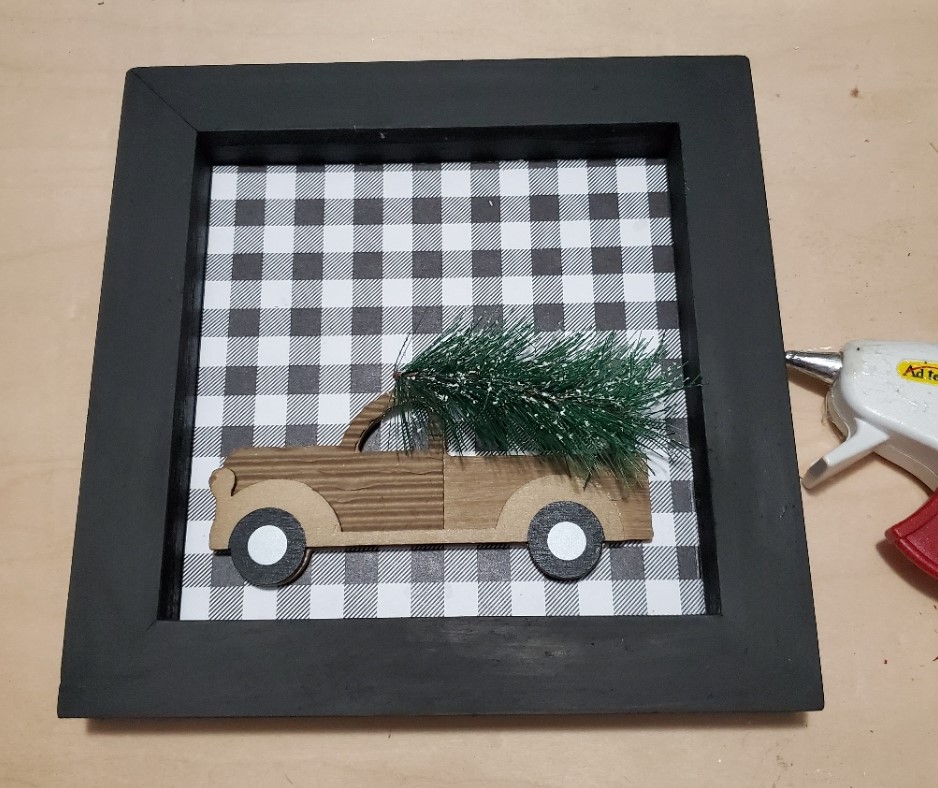
FOURTH – add any embellishments desired (optional). I added some berries and bells to the tree in the truck bed
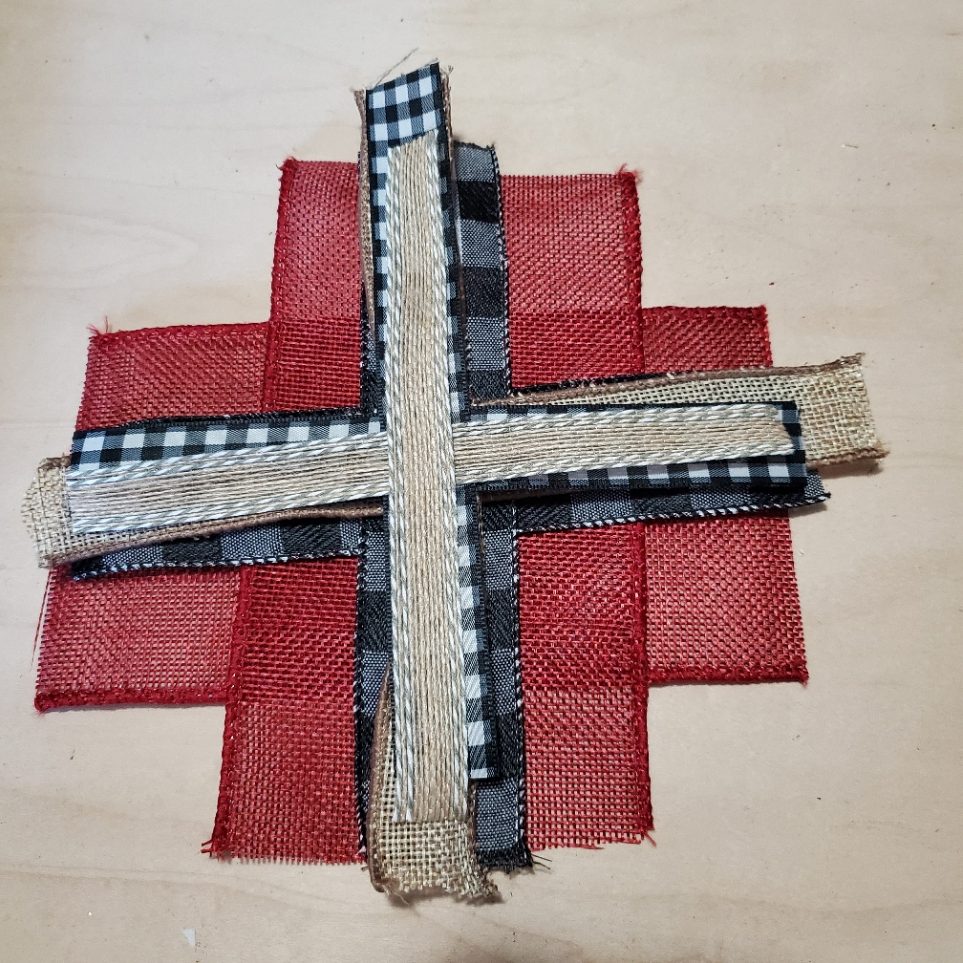
FIFTH – make your bow for the top of the frame. I love the shabby chic bow that I highlighted in my last post from Re Fab.
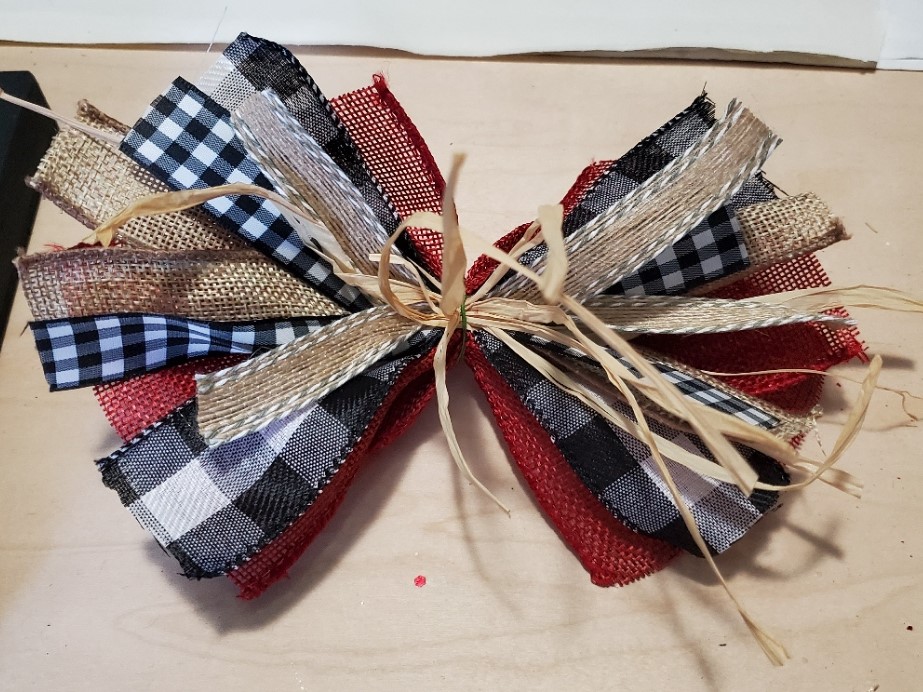
SIXTH – hot glue to bow to the top of the frame
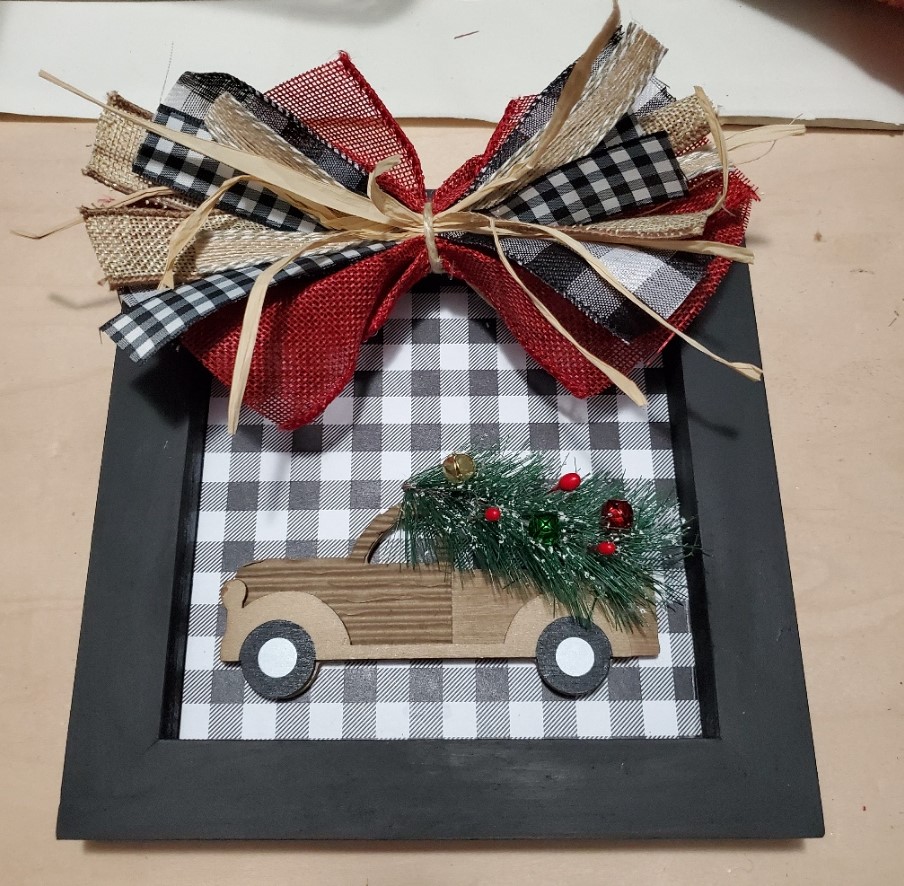
I think it turned out pretty cute. One project down…..more to go!!!